Rescue

Shallow Water Blackout

Posted on by Trainer in Aquatics, Articles, Lifeguard, Rescue, Training Leave a comment

Shallow Water Blackout (SWB) is the silent killer. Shallow Water Blackout occurs when a swimmer holds their breath while underwater. Swimmers are at risk of passing out due to a lack of oxygen. Since there is no struggle or signs someone is in danger, it can quickly result in death. Unfortunately, the number of deaths attributed to SWB is not fully known, because they are often labeled as a traditional drowning. So, what exactly is shallow water blackout? Why does SWB continue to occur and how can we, as Lifeguards and Aquatic professionals, make the public more aware of this issue.

What is Shallow Water Blackout?
According to http://www.shallowwaterblackoutprevention.org/how-it-happens, Shallow Water Blackout results from hypoxia (low oxygen) to the brain. What triggers one to breathe is the elevation of carbon dioxide (CO2), not low oxygen (O2). The danger is exacerbated with hyper-ventilation prior to breath-holding. One basically “blacks out” or faints in the water. For some, their lungs will take on water leading to drowning while others simply suffocate or die of other causes brought on by the breath-holding.

SWB can happen in as little as three feet of water. It can happen so fast that even the most experienced lifeguard could miss it.

Swimming World magazine stated some are caused by kids who dare their friends to a breath-holding contest. Not wanting to lose, one of them will push their bodies past the limit, when their brain shuts down before it tells the body to go to the surface.

Why does it continue to happen?
There is a lack of education and awareness on the dangers of breath-holding. When you go to a pool you almost always see a “No Running” or a “No Diving” sign posted but “No Breath-Holding” signs have yet to become the norm.

Another issue is that underwater breath-holding and underwater swimming has been practiced for decades. Breath-holders, whether it be a competitive swimmer, a child, freediver, etc., do not understand how to prevent SWB.

The CDC warns that “dangerous underwater breath-holding behaviors” can lead to otherwise strong, healthy swimmers losing consciousness underwater and drowning.

What can we do to make those who visit our facilities more aware of SWB?
As an Aquatic Professional, I think that taking the time to educate the public, as well as the lifeguards who serve those that use your facility, is key in helping to raise awareness. Pool signage and a small handout with information and tips on preventing Shallow Water Blackout (see tips below) for the bathers could go a long way.

Tips to Prevent SWB:
• Don’t Play Breath-holding games      
• Don’t Hyperventilate
• Don’t Swim Alone
• Don’t Ignore the Urge to Breathe

Holding an in-service training for your lifeguards on the importance of monitoring breath holding could help them identify risky behaviors. Make sure that they always scan the bottom of the pool. Remind them that even when its swim team practice, they should stay vigilant (remember: they have lifeguards at the Olympics too). Creating a conversation among the staff about staying safe is always a good thing!

At Safety Training Pros we proudly serve the Northern California & Northern Nevada for all your aquatic training needs. We offer Waterfront Lifeguard, Lifeguard, Shallow Water Lifeguard, Basic Water Rescue, Safety Training for Swim Coaches, Lifeguard Instructor, and Pool In-Service Training.

If you or your facility need training, please contact us at info@safetytrainingpros.com or 1-844-900-SAFE.


Planning for Emergencies in the Workplace

Posted on by Trainer in AED, CPR, CPR for Business, General, Rescue, Training Leave a comment

Emergencies happen when you least expect it, however the more prepared you and your facility are to deal with these types of incidents and accidents the safer everyone will be. Various documents have been produced by OSHA, FEMA, and other government agencies to help businesses prepare for emergencies. Does your company have an Emergency Action Plan (EAP) for a Fire, Medical Emergency, Bomb Threat, Chemical Spill, or a Shooter on Site? Would you or your co-workers know what to do?

The purpose of an EAP is to facilitate and organize employer and employee actions during workplace emergencies. At Safety Training Pros we are committed to making sure businesses are more effective when it comes to Emergency Planning, In-Service Training, and much more. We want to make sure that your staff is safe in case of an emergency.

FEMA has established the Ready Program that includes five steps to prepare workers for emergencies of all types. Well-developed EAP’s give employees the understanding of how to respond in a variety of emergency situations, they know where to go, how to keep safe, and what equipment to take and/or use. With proper training this means that they are able to respond quicker and safer thus reducing injuries and fatalities. Below are the five steps of the Ready Program from http://workplaceemergencyplans.com/

1. Program Management
• Know the regulations that govern your business emergency action plan
• Organize an Emergency Action Team to implement the development and administration of your emergency program

2. Planning – The Practical Considerations of Developing an Emergency Plan – Planning must include:
• What to do in the event of an emergency
• Steps to take to prevent emergencies
• Ways to limit the business impact of emergencies

3. Implementation – What the Emergency Action Plan Must Include
• Resource Management
• Emergency Response
• Crisis communications
• Business continuity
• Information technology
• Employee assistance
• Incident management
• Employee Training

4. Testing and Exercises
• Testing and evaluating the emergency plan
• Differentiating between different types of exercises
• How to conduct exercises
• Evaluating the exercise results to know effectiveness of the emergency plan

5. Program Improvement
• Determine when the emergency plan needs to be reviewed
• Evaluate the emergency plan
• Make changes and improvements to the plan

It is important to remember to include both management and employees in creating an emergency action plan. Create a Safety Team that meets on a regular basis. Make sure to review the plan and assess it so that necessary developments and changes can be made. It’s also important, of course, that you write up this plan and provide copies to every employee in your workplace.

Remember, you don’t come to work expecting an incident or accident to occur, but the more prepared you are the safer everyone around you will be. For more information on safety training such CPR, First Aid and AED please contact Safety Training Pros at 844-900-SAFE (7233).


How to write a patient care report

Posted on by SafetyPros in In-Service, Lifeguard, Professional Rescuers, Rescue, Title 22 Leave a comment

Many emergency responders including Lifeguards, complete a patient care report on the incidents they respond to. Responders involved in the incident need to complete the appropriate report form as quickly as possible after providing care. Record only factual information of what was heard and seen and any action taken. Do not give personal opinions.

Documentation is important for legal reasons as well as for tracking when, where and how often incidents occur. Reports provide valuable information for facilities to use when they assess safety protocols, such as staffing levels or placement of lifeguard stations.

Here is a checklist of questions providers should answer before submitting a report:

  • Are your descriptions detailed enough?
  • Are the abbreviations you used appropriate and professional?
  • Is your report free of grammar and spelling errors?
  • Is it legible?
  • Is the chief complaint correct?
  • Is your impression specific enough?
  • Are all other details in order?


1. Check descriptions
Upon the completion of every incident, your report documents all events that occurred. This includes a detailed assessment of the situation and a full recounting of the treatment administered to the patient. It is specific, informative, free of ambiguity and negligence.

  • Which arm is the patient having pain?
  • Is it the upper or lower part of the arm?
  • What was the timeline of the incident?


2. Check (and recheck) spelling and grammar

Your report should paint a picture, but this is impossible to do without proper English. Besides not being accurate or professional, incorrect English may very well lead a reader to believe something false. For example, there may be confusion (and laughter) if a report says “patient fainted and her eyes rolled around the room.” Though this is a humorous example, dire consequence can follow confusing reporting.

Reporting should be free of misspellings and the understanding of what you are trying to say should be clear. For example, the trauma surgeon should have a good understanding of the mechanism of injury that brought the patient to the hospital from reading your report.

3. Assess your chief complaint description
An area of the report that is frequently misused is the chief complaint which should explain why you were needed or why the patient is being treated. Chief complaint is not the cause of the injury. For example, a chief complaint is pain to the right lower arm, not the fact that the patient has fallen off a ladder. Using the patient’s own words is an appropriate practice if they describe symptoms of their chief complaint.

4. Review your impressions
An impression encompasses the reasons for patient treatment. Trauma and fall are too vague to be used as impressions. Include the body areas or symptoms that are being treated. In other words, what treatment protocol is being followed?

If you are following a stroke protocol, and your assessment indicates a possible stroke, this should be included in your impression. Multi-systems trauma injuries bring additional challenges, but if multi-body systems are involved, they all should be included in your impression of the patient.

5. Check the final details
The patient’s SAMPLE including past medical history and medications are important to note. Document the patient’s history completely. Remember bystanders or those close to the patient can often provide valuable information about the patient.

Another important aspect to clearly document is the outcome of your treatments. Some reports have a standard text box that indicates improved, but in your narrative you should clearly document how the treatment improved the patient’s condition.

After the incident and upon completion of the report writing, you may be asked to attend an operational debriefing. The goals of the debriefing are to examine what happened, assess the effectiveness of the EAP, condier new ways to prevent similiar incidents and to be alert for stress reactions after a critical incident. Be sure to avaoid assigning blame or criticizing anyone’s actions or reactions.

For additional in-service training at your facility, contact the rescue professionals at Safety Training Pros 844-900-SAFE (7233).


Creating a First Aid Kit for Your Home

Posted on by Trainer in Articles, Rescue, Training Leave a comment

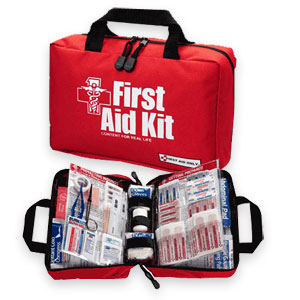
Having a great First Aid kit at home is easy to do. Below is an article, by Tracey Neithercott, that outlines the supplies you need for both major and minor emergencies. It also has a section for Diabetes and Medications. Get trained and know what to do in an emergency. If it is time for you to get certified, join our open enrollment class on December 14th. If you have any other questions, please feel free to contact the experts at Safety Training Pros 916-538-6447 or info@safetytrainingpros.com.

When it comes to your health, preparing for the worst isn’t pessimistic. It’s smart. That’s why experts advise everyone to stash medical supplies for a rainy day. Or, you know, a day when you’ve just sliced your finger, sprained your ankle, or broken out in hives.

A well-stocked first-aid kit is easy to prepare and useful in both minor and more serious emergencies. The bathroom may seem like the ideal spot to stash the essentials, but because of heat and humidity, it’s not the best place to keep medicine or many diabetes supplies. Instead, store your first-aid kit in a room where you spend a lot of time or in an easy-to-reach area of a closet.

Creating your own kit is easy. Start with a waterproof container, then add the supplies listed (“In the Kit,” below). As far as medications go, experts recommend adding baby aspirin to the mix, which can help during a heart attack. (After calling 911, chew two baby aspirin or one non-coated adult aspirin. Chewed aspirin works faster than swallowed pills.) There’s less of a consensus about other medications. Those that must be kept cold, such as insulin, don’t need to be included. Others, such as cough syrup, ibuprofen, and antidiarrheal drugs, can be added to the mix.

The tricky part is keeping items current. “If you’re going to put medications in there, anything that can potentially expire, you want to check that often,” says David Berry, PhD, ATC, an athletic trainer, professor at Weber State University, and member of the American Red Cross Scientific Advisory Council. He recommends reviewing the items in your first-aid kit at least twice a year and replacing anything that is expired.

Also remember to refill the kit as you use items in it. “The problem is, people take things out, they use them, and they don’t replace them,” Berry says. “[You] need to replace those items so in case an event transpires, [you] have the equipment readily available again.”

Wound-care products are some of the most important items in your kit. Irrigation solution, for instance, is helpful for cleaning wounds of dirt, debris, and bacteria. That’s a particularly important step for people with diabetes, who are more susceptible to infection.

Berry says plain soap and water will do the trick, but it’s smart to store saline solution in your kit, which comes in handy when you can’t make it to the sink. Noticeably absent: hydrogen peroxide. Neither that nor alcohol is useful for cleaning wounds. “If you look at the research, they actually destroy some of the healthy cells,” he says. “You don’t want to destroy the healthy tissue.”

Another aspect of building a first-aid kit you’ll want to pay attention to: your family’s allergies. Is someone allergic to latex? Stock non-latex gloves and bandages. Do you have an allergy to certain antibiotic ointments? Be careful to stash the right type in your kit.

For diabetes, take extra precautions. You can’t store insulin in a first-aid kit because it needs to be refrigerated before opening. But you can stock other supplies, such as a backup meter, extra insulin pump infusion sets, batteries for any devices you use, fast-acting glucose and glucagon for lows, syringes and pen needles, lancets, and a backup container of test strips (just be sure to use them before they expire!).

Finally, keep a list of emergency phone numbers in your kit, such as the poison control center 800-222-1222 and your doctors’ office.

If you’ve injured yourself, make a follow-up appointment with your health care provider. First aid is essential, but it’s only the first step in the process. Continued care can ensure you stay safe in the long run.

In the Kit

The following supplies make for a comprehensive first-aid kit.

General
Adhesive cloth tape
Alcohol-based hand sanitizer
Aloe vera gel for burns (first degree only)first-aid-kit
Antibiotic ointment
Antiseptic wipes
Bandage roll (such as an Ace bandage)
Bandages in assorted sizes (such as Band-Aids)
Calamine lotion
Compact mobile splint (Sam Splint)
First-aid guidebook (such as American Red Cross Pocket First Aid)
Gauze pads
Hydrocortisone ointment
Instant cold packs or plastic bags for ice (1 quart or 1 gallon)
Latex-free face shield
Latex-free gloves
Low-dose aspirin (such as baby aspirin)
Scissors
Thermometer
Triangular bandages (for slings)
Tweezers
Wound wash (such as saline solution)

Diabetes

  • Batteries (for meters, pumps, and continuous glucose monitors)
  • Blood glucose meter
  • Fast-acting glucose (such as tablets or gels)
  • Glucagon kit
  • Infusion sets for pumps
  • Injection pen needles
  • Insulin syringes
  • Lancets
  • Skin prep wipes
  • Test strips (for blood glucose and ketones)

4 C’s of Wound Care

  1. Clean the wound with soap and water or using a wound wash, such as saline solution.
  2. Coat with antibacterial ointment, such as Neosporin. Use sparingly.
  3. Cover with a bandage.
  4. Call for a doctor’s appointment to follow up if needed (if you need stitches, for example, or the wound shows signs of infection, such as redness and pus).

Medications (Optional)

While it’s not entirely necessary to store medications in a first-aid kit (aside from aspirin, which is crucial during a heart attack), it may be a good idea to include the following. When you hit the road, grab your kit. That way, if you’re ill but can’t find a pharmacy, you’ll have the basics on hand.

  • Antacid
  • Antidiarrheal (such as Pepto-Bismol*)
  • Antihistamine (such as Benadryl)
  • Cough syrup
  • Decongestant
  • Ibuprofen

*Or your doctor may prescribe a just-if-needed antimicrobial medication, such as tetracycline.


How to care for an Unresponsive Person with an Obstructed Airway

Posted on by Trainer in CPR, CPR for Business, General, Professional Rescuers, Rescue, Training Leave a comment

Have you ever asked yourself, what is the rationale behind the steps for caring for an unresponsive person with an obstructed airway? The American Red Cross has done a great job of explaining this below.

Since the evidence evaluation process in 2005 with a re-affirmation in 2010 and 2015, the care for a person with an obstructed airway that is (or becomes) unresponsive is to perform CPR.  Part of the rationale is based on principles of education and part is based on the science (medicine and physics).  From an educational perspective it is easier to learn and remember fewer skills and by teaching trained responders that when a person is unresponsive and not breathing to perform CPR.  It simplifies the process and increases the likelihood that a responder will remember (and hopefully) be more willing to act.  Because the evidence supports the delivery of chest compressions (chest thrusts) to relieve an obstructed airway, the process of CPR with a slight modification if a breath will not go in is the new standard of care.

I am often asked, “Will the attempt to give a breath push the object further downward?”  The general answer is no, but if it does go far enough it may not immediately matter.  Air will travel the path of least resistance and when a person becomes unresponsive often the muscles in the airway that may be closed or in spasm when the person is awake will relax allowing an attempted breath to pass by the object and provide at least some oxygen or the object may move or be dislodged when the person is lowered to the ground.  The amount of pressure or force to deliver a breath should not be able to move a lodged obstruction, but if it were able to move the object further downward and the object was small enough to pass beyond the vocal cords (the narrowest portion of the airway) it may relieve the complete obstruction or move the object out of the trachea (windpipe) and into most likely the right bronchus allowing air to pass into the left lung (while not ideal, certainly affords time for the problem to be corrected by a healthcare professional).

The other component relates to a person who was unresponsive with an unknown obstruction.  If you were unable to ventilate a person initially and felt there was an obstruction and changed the procedure to skip ventilations all together, it could prove to be a critical error. There are several reasons that a trained responder may be unsuccessful providing ventilations, with an airway obstruction being only one and perhaps the least common.  Proper opening of the airway and seal are common errors that are correctable and should be attempted when a breath does not go in.  Immediately switching to no ventilations would sacrifice the ability to provide oxygen after each set of 30 compressions (30:2 is still considered the standard of care for trained responders over hands-only CPR based on the science (and especially with an airway or breathing cause)).

Are you in need of CPR or First Aid Training? Is it time to get re-certified? Safety Training Pros is the premier safety training experts for individuals, groups, businesses, and government agencies. We provide professional training with high quality safety training materials in an engaging atmosphere so our clients have the life saving skills and knowledge that they need in an emergency. As a Licensed Training Partner of the American Red Cross, ASHI, and Medic First Aid, the leading providers of health and safety training, we can easily and efficiently provide the quality professional training required by all our customers. To speak with a safety expert please call us at 844-900-SAFE or visit us at www.safetytrainingpros.com.


October is Sudden Cardiac Arrest Awareness Month!

Posted on by Trainer in AED, CPR, General, Rescue, Training Leave a comment

Did you know that sudden cardiac arrest takes the lives of over 300,000 Americans each year? According to Mary Newman, SCA Foundation president, “About 500 Americans suffer sudden cardiac arrest every day and only 30 survive.”

What is Sudden Cardiac Arrest?

According to Heartsine.com, Sudden Cardiac Arrest (SCA) is a malfunction of the heart’s electrical system, which causes it suddenly and unexpectedly to begin to beat rapidly, then erratically, and finally to stop altogether. When this happens, the heart cannot pump blood effectively. As such, blood flow to the brain is compromised and the victim quickly loses consciousness.

What can we do to increase the survival rate?

  1. Get CPR/AED Certified
  2. Have better access to AED’s

Where can I get this type of Training?

Safety Training Pros is the premier safety training experts for individuals, groups, businesses, and government agencies.We provide professional training with high quality safety training materials in an engaging atmosphere so our clients have the life saving skills and knowledge that they need in an emergency. As a Licensed Training Partner of the American Red Cross, ASHI, and Medic First Aid, the leading providers of health and safety training, we can easily and efficiently provide the quality professional training required by all our customers. This includes, but is not limited to, CPR and AED training. Please call us for more information at 844-900-SAFE or visit us at safetytrainingpros.com.


CPR Training in High Schools-Bill Passed

Posted on by Trainer in AED, CPR, General, Rescue, Training Leave a comment

“Students can be taught the fundamental life-saving skill of hands-only CPR in 30 minutes or less” EMS1 Staff 

In August, Gov. Jerry Brown was given a month to sign a new bill that would make CPR training a high school graduation requirement. Over the weekend, he signed that bill putting it into effect beginning the 2018-2019 school year. Below is an article, by EMS1 Staff at ems1.com, that discusses the importance of having this type of training in our schools.

SACRAMENTO, Calif. — Governor Jerry Brown signed AB 1719 to teach CPR in schools into law Sept. 24. The new law makes California the 35th state to provide CPR training in high schools, along with Washington, D.C.

“As an Emergency Medical Technician for over 30 years, I know that CPR is one of the most important life skills a person can have,” Calif. Assembly member Rodriguez, author of the bill said. “By teaching CPR in high school, we are sending students into the world with essential, life-saving skills.”

High schools that require a course in health education for graduation will begin to offer instruction in performing CPR in the 2018-2019 school year. Students can be taught the fundamental life-saving skill of hands-only CPR in 30 minutes or less.

“I am so glad I learned CPR at a young age because it helped save my friend’s life,” said 13-year-old Skylar Berry, an American Heart Association volunteer who learned CPR at a camp organized by her local Sacramento Metro Fire department. “We should all be prepared to act in the case of an emergency and I’m happy other students will now get the chance to learn CPR.”

Berry was at a birthday party when a group playing in the pool realized one of their friends was at the bottom. As they brought him to the surface, Skylar, who was 11 at the time, remembered the CPR training she’d received and immediately sprang into action. Since then, she’s been a strong advocate for teaching CPR to her fellow classmates and created the “Stayin’ Alive” club at her school to convey the importance of learning the lifesaving skill.

With the passage of AB1719, tragedies like the loss of Debbie Wilson’s daughter can be averted.

“If someone who had been near my daughter at the time of her collapse had known how to conduct cardiopulmonary resuscitation, her life could have been saved,” said Debbie Wilson, AB 1719 advocate and mother of a 17-year-old daughter who suffered a sudden cardiac arrest during tennis practice. “I want all students to have a chance to learn this life-saving skill so other families don’t suffer the same heart-break that ours did.”

Supporters of the bill included AHA, the American Red Cross, the California Professional Firefighters, the California State Parent Teacher Association, the California School Boards Association and California School Employees Association.

“So many lives have been saved because of the heroic act of bystanders who performed CPR. On the other hand, there are just as many stories of people who did not make it because no one nearby took action,” said Kathy Magliato, MD, AHA Western States Affiliate Board Member and a cardiothoracic surgeon. “With CPR in Schools, we have the opportunity to create a generation in which teens and young adults in California is trained in CPR as part of their health education and prepared to save lives. AB 1719 will add thousands of qualified lifesavers to our state.”


California New AED Laws Senate Bills 658 and 287

Posted on by SafetyPros in AED, CPR, CPR for Business, Rescue Leave a comment

An automated external defibrillator (AED) is a lightweight, portable device that delivers an electric shock through the chest to the heart. The shock can stop an irregular rhythm and allow a normal rhythm to resume in a heart in sudden cardiac arrest. Sudden cardiac arrest is an abrupt loss of heart function. If it’s not treated within minutes, it quickly leads to death. AED’s make it possible for more people to respond to medical emergencies where defibrillation is required. Because they are portable and easy to use, they can be used by nonmedical people. They should be a part of your emergency response plan that also includes the use of 9-1-1 and prompt delivery of cardio pulmonary resuscitation (CPR).

There are a variety of law regarding AEDs. Recently, California has enacted two, new AED laws (Senate Bills 658 and 287), the second of which was just chaptered into California law October 2, 1015.

S.B. 658 amends section 1714.21 of the CA Civil Code and section 1797.196 of the CA Health and Safety Code to substantially reduce the requirements placed upon AED owners to qualify for Good Samaritan protection in the state.  Most notably, the new law eliminates the need for a physician to oversee a company’s AED program. This will significantly drop cost of ownership as well as reduce the inconvenience factor of owning an AED. In addition, the new law reduces the frequency with which AED owners need to check their devices and pares back documentation rules.

S.B. 287 installs mandates across a sweeping array of building types (assembly, business, educational, factory, institutional, mercantile, and residential) that, effective 1/1/17, will require AEDs in all new construction, generally subject to an occupancy threshold of 200 people.

For more information about purchasing an AED for your workplace, or to arrange training for your staff, call 844-900-SAFE.


Hypoxic Blackout in Aquatic Activities is Deadly Serious

Posted on by SafetyPros in Aquatics, General, Lifeguard, Professional Rescuers, Rescue, Training Leave a comment

The practices of hyperventilation preceding underwater swimming and extended breath-holding in the water are dangerous and potentially deadly activities. These activities can put the body in a state of hypoxia—a condition in which the body is deprived of adequate oxygen supply. It is our goal to educate those that we teach about the risks of hypoxia in the water and help ensure that they do not engage in behavior that could result in loss of consciousness and death. This includes lifeguards, Water Safety instructors and swim coaches, participants in a learn-to-swim program and their parents as well as the general public who engage in aquatic activities.
The result of these activities is referred to by some as “shallow water blackout.” The use of this terminology in these cases is misleading since water depth is not a Swim Coachfactor in the body’s response to hyperventilation and extended breath-holding. Shallow water blackout is the medical condition that can result as a deep water diver returns to surface and blacks out in water that is typically less than 5’ deep. There are specific precautions and prevention strategies for this condition.
In an effort to be more clear and accurate, Safety Training Pros will not use the term shallow water blackout. In our training programs and public education, we use terminology that describes the dangerous behaviors that should be prevented—voluntary hyperventilation preceding underwater swimming and extended breath-holding. For simplicity, we refer to this condition as hypoxic blackout.
Water Safety

Lifeguards, instructors and coaches are trained to be alert and prevent swimmers attempting to hyperventilate and engage in extended breath-holding activities. Lifeguards are taught to respond quickly to any individual who is motionless in the water for any reason, including loss of consciousness. Water Safety instructors are also taught to limit participants to a single inhalation whenever they ask participants to hold their breath and submerge, and to set safety limits whenever setting up activities that involve underwater swimming. Being confident and comfortable underwater is an essential aquatic skill. Knowing what breath holding techniques are unsafe is important in exercising good judgment for safe skill practice and supervision of underwater aquatic activities.


Stay safe this summer and remember When Every Second Counts, Your Training Matters!


Halloween Candy and Choking-Related Incidents Among Children

Posted on by SafetyPros in CPR, General, Pediatric, Rescue, Training Leave a comment

It’s that time of year again! Danger is lurking for your little goblins.

A study published July 20, 2013 in the journal Pediatrics looks at nonfatal food choking incidents among children 14 years or younger in the U.S.

    • An estimated 111,914 children ages 0 to 14 years were treated in US hospital emergency departments from 2001 through 2009 for nonfatal food-related choking, yielding an average of 12,435 children annually and a rate of 20.4 visits per 100 000 population.
    • The mean age of children treated for nonfatal food-related choking was 4.5 years.
    • Children aged ≤1 year accounted for 37.8% of cases
    • Male children accounted for more than one-half (55.4%) of cases.
    • Of all food types, hard candy was most frequently (15.5% [16 168 cases]) associated with choking, followed by other candy (12.8% [13 324]), meat (12.2% [12 671]), and bone (12.0% [12 496]).
    • Most patients (87.3% [97 509]) were treated and released, but 10.0% (11 218) were hospitalized, and 2.6% (2911) left against medical advice.

This Halloween, are you prepared to come to the aid of a child in an emergency?

Trick or Treat

Choking can occur when a solid object enters a narrowed part of the airway and becomes stuck. Young children are particularly at risk for choking because of the small size of their air passages, inexperience with chewing, and a natural tendency to put objects in their mouths.

On inhalation, the object can be drawn tighter into the airway and block air from entering the lungs. A forceful abdominal thrust beneath the ribs and up into the diaphragm can compress the air in the chest and “pop” the object out of the airway. Direct compression of the chest over the breastbone can also create enough pressure to expel an object and is typically used for obese or pregnant victims with blocked airways.

An emergency care provider must be able to recognize the difference between a mild blockage and a severe blockage.

With a mild blockage, a child can speak, cough, or gag. This type of blockage is typically cleared by coughing. Encourage a child with a mild blockage to cough forcibly. Stay close and be ready to take action if things worsen.

When a severe blockage occurs, a child cannot dislodge the object on her own. Signs of severe obstruction include very little or no air exchange, lack of sound, and the inability to speak or cough forcefully. The child may hold her hands to her throat as she attempts to clear an obstruction naturally.

Please note: Abdominal and chest thrusts can cause internal injury. Anyone who has been treated for choking with these maneuvers should be evaluated by EMS or a physician to ensure there were no injuries.

To help prevent choking, Kidshealth.org has some tips to keep in mind during all the upcoming treat-filled holidays:

    • Encourage kids to sit when eating and to chew thoroughly. Teach them to chew and swallow their food before talking or laughing.
    • Be especially vigilant during adult parties, when nuts and other foods might be easily accessible to small hands. Clean up promptly and carefully, and check the floor for dropped foods that can cause choking.
    • Never let kids run, play sports, or ride in the car with gum, candy, or lollipops in their mouths.

Ready to give yourself a treat and learn a few tricks at a first aid, CPR, and AED class near you?